
Today we will learn how to use the V-ray renderer to render our wineglass that we created before in this tutorial: http://venomx3d.blogspot.ro/2012/06/creating-wineglass-part-i-modeling.html We need V-Ray which is a plugin for 3Ds MAX (it's not free), and some HDR images. Some of the HDR images are found on the web for free. We will also take a look at rendering with global illumination to achieve realistic results. This is a step by step tutorial with pictures so if you ever get stuck make sure to check every image as well to understand better the process, if you still have any question please post it into the comment section below this tutorial. So let's get started!
We will be using a free lake environment HDRI that you can download here
Step 1: Open your wineglass scene that you created before. Press F10 to bring up the Render Setup, inside the Common tab scroll down to Assign Renderer, press the [...] box after the Production and choose V-ray from the list:

Step 2: Press M to bring up the Material Editor. Now select a material slot from the editor, then click on Standard button and choose VRayMtl from the list:

Step 3: Inside the V-ray material change the following:
NOTE: you can change the colors by pressing on the color box!
Diffuse Color > pure black
Refract Color > 253,253,253 (RGB)
Reflection Color > pure white
Enable Fresnel Reflections (reflection required for objects like glass, water etc).
Enable Background button to see the material properties into the slot.
Increase Subdivs to 12 for Reflection and Refraction

Step 4: Select our wineglass object inside the viewport and inside the VRayMtl press on Assign Material to Selection (you should see the object turning transparent into the viewport)

Step 5: If you followed the previous modeling tutorial of the wineglass make sure that you Scale down the 3D wineglass because it will be easier to create our plane and V-ray will create more accurate renders. Make sure that your object is about this big compared to the Grid:

Step 6: Create a large plane (the dimensions are not fixed) having lots of Length segments because we will need to bend it and a few Width segments:

Step 7: With the Plane still selected apply a Bend modifier from the Modifier List and change the following:
Angle: 90
Direction: 90
Axis: Y
Enable Limit effect and change the upper limit to achieve a nice fillet like below:

Step 8: Add a V-ray Light in the Top view and change it's type to Dome:

Step 9: With the light selected go to the Modify tab and change the following:
Type: Dome
Multiplier: 1
Thick Invisible so that we don't see the light.

Step 10: Scroll down in the V-ray Light to the Texture tab, press on the None button and apply a V-ray HDRI from the list:

Step 11: Now press M to bring up the material editor, then hold click and drag the Vray(HDRI) from the button into a new material slot. Choose Instance as Method:

Step 12: Inside the new VRayHDRI material click on browse and choose your Lake Crater HDRI image (this image will bring light to our scene).

Step 13: Now inside the VrayHDRI material change it's type to Spherical Environment and the Overall multiplier to 3:

Step 14: Now we will need to set the other VrayHDRI for our Reflections and Refractions. To do that press F10 to bring up the Render Setup. Go down to Environment, apply a VrayHDRI image to Reflections /Refractions environment and drag it into a new slot:

Step 15: Now press the Browse button as we did before and choose the blurred HDRI image: (this map will be our reflection and refraction map. It means that objects with reflection or refraction will show this map onto their surface).

Step 16: Change Overall multiplier to 3 and the type to Spherical Environment:

Step 17: Now we're done with our lightning and HDRI setup. Next assign a new VrayMaterial to a new slot for our plane. Change it's Diffuse color to whatever you want your plane color to be, add a bit of reflection (about 20,20,20 in RGB) and hit Assign Material to Selection button:

Step 18: Inside V-ray go to Indirect Illumination (GI) tab and change the setup like below:


Step 19: Inside the V-ray tab change the setup:

Step 20: And this is my Settings tab:

Step 20: Press Shift+F in Viewport to see the Safe Frame then choose an angle which you like and hit Render (Shift+Q). You can also change the resolution of your render from the Common tab.
Your result should be similar to this:
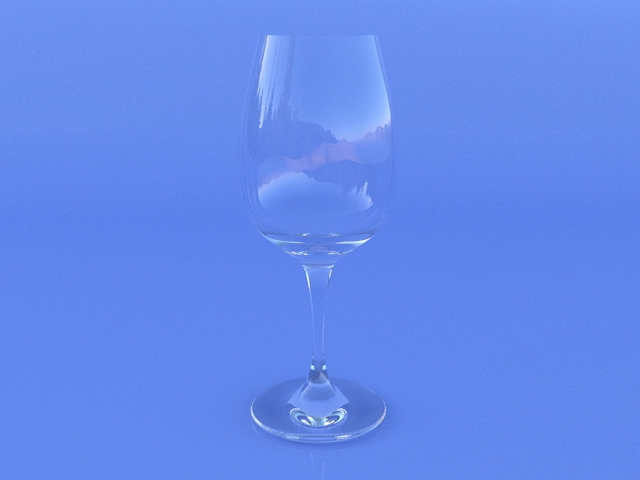
So this is the basic setup of V-ray renders using HDRI images. You can save this setup as a Preset so you don't have to do it every time you want to make a V-ray render. To do that go inside the Settings tab and click Presets and click Save, and when you like to create a render with V-Ray just go set V-Ray as a renderer, go to Settings Presets and click Load and all your settings will be loaded. You can also try to change the multiplier of the light to achieve brighter or darker results of the image, or by changing the Overall mult of the HDRI images from the Material Editor. Just experiment with different values until you achieve the result you are looking after. V-Ray is a powerful renderer and with global illumination you bring realism into every render you make.
If you still got any questions please post them into the comment section below. See you next time!